Connecting the EXT3-1
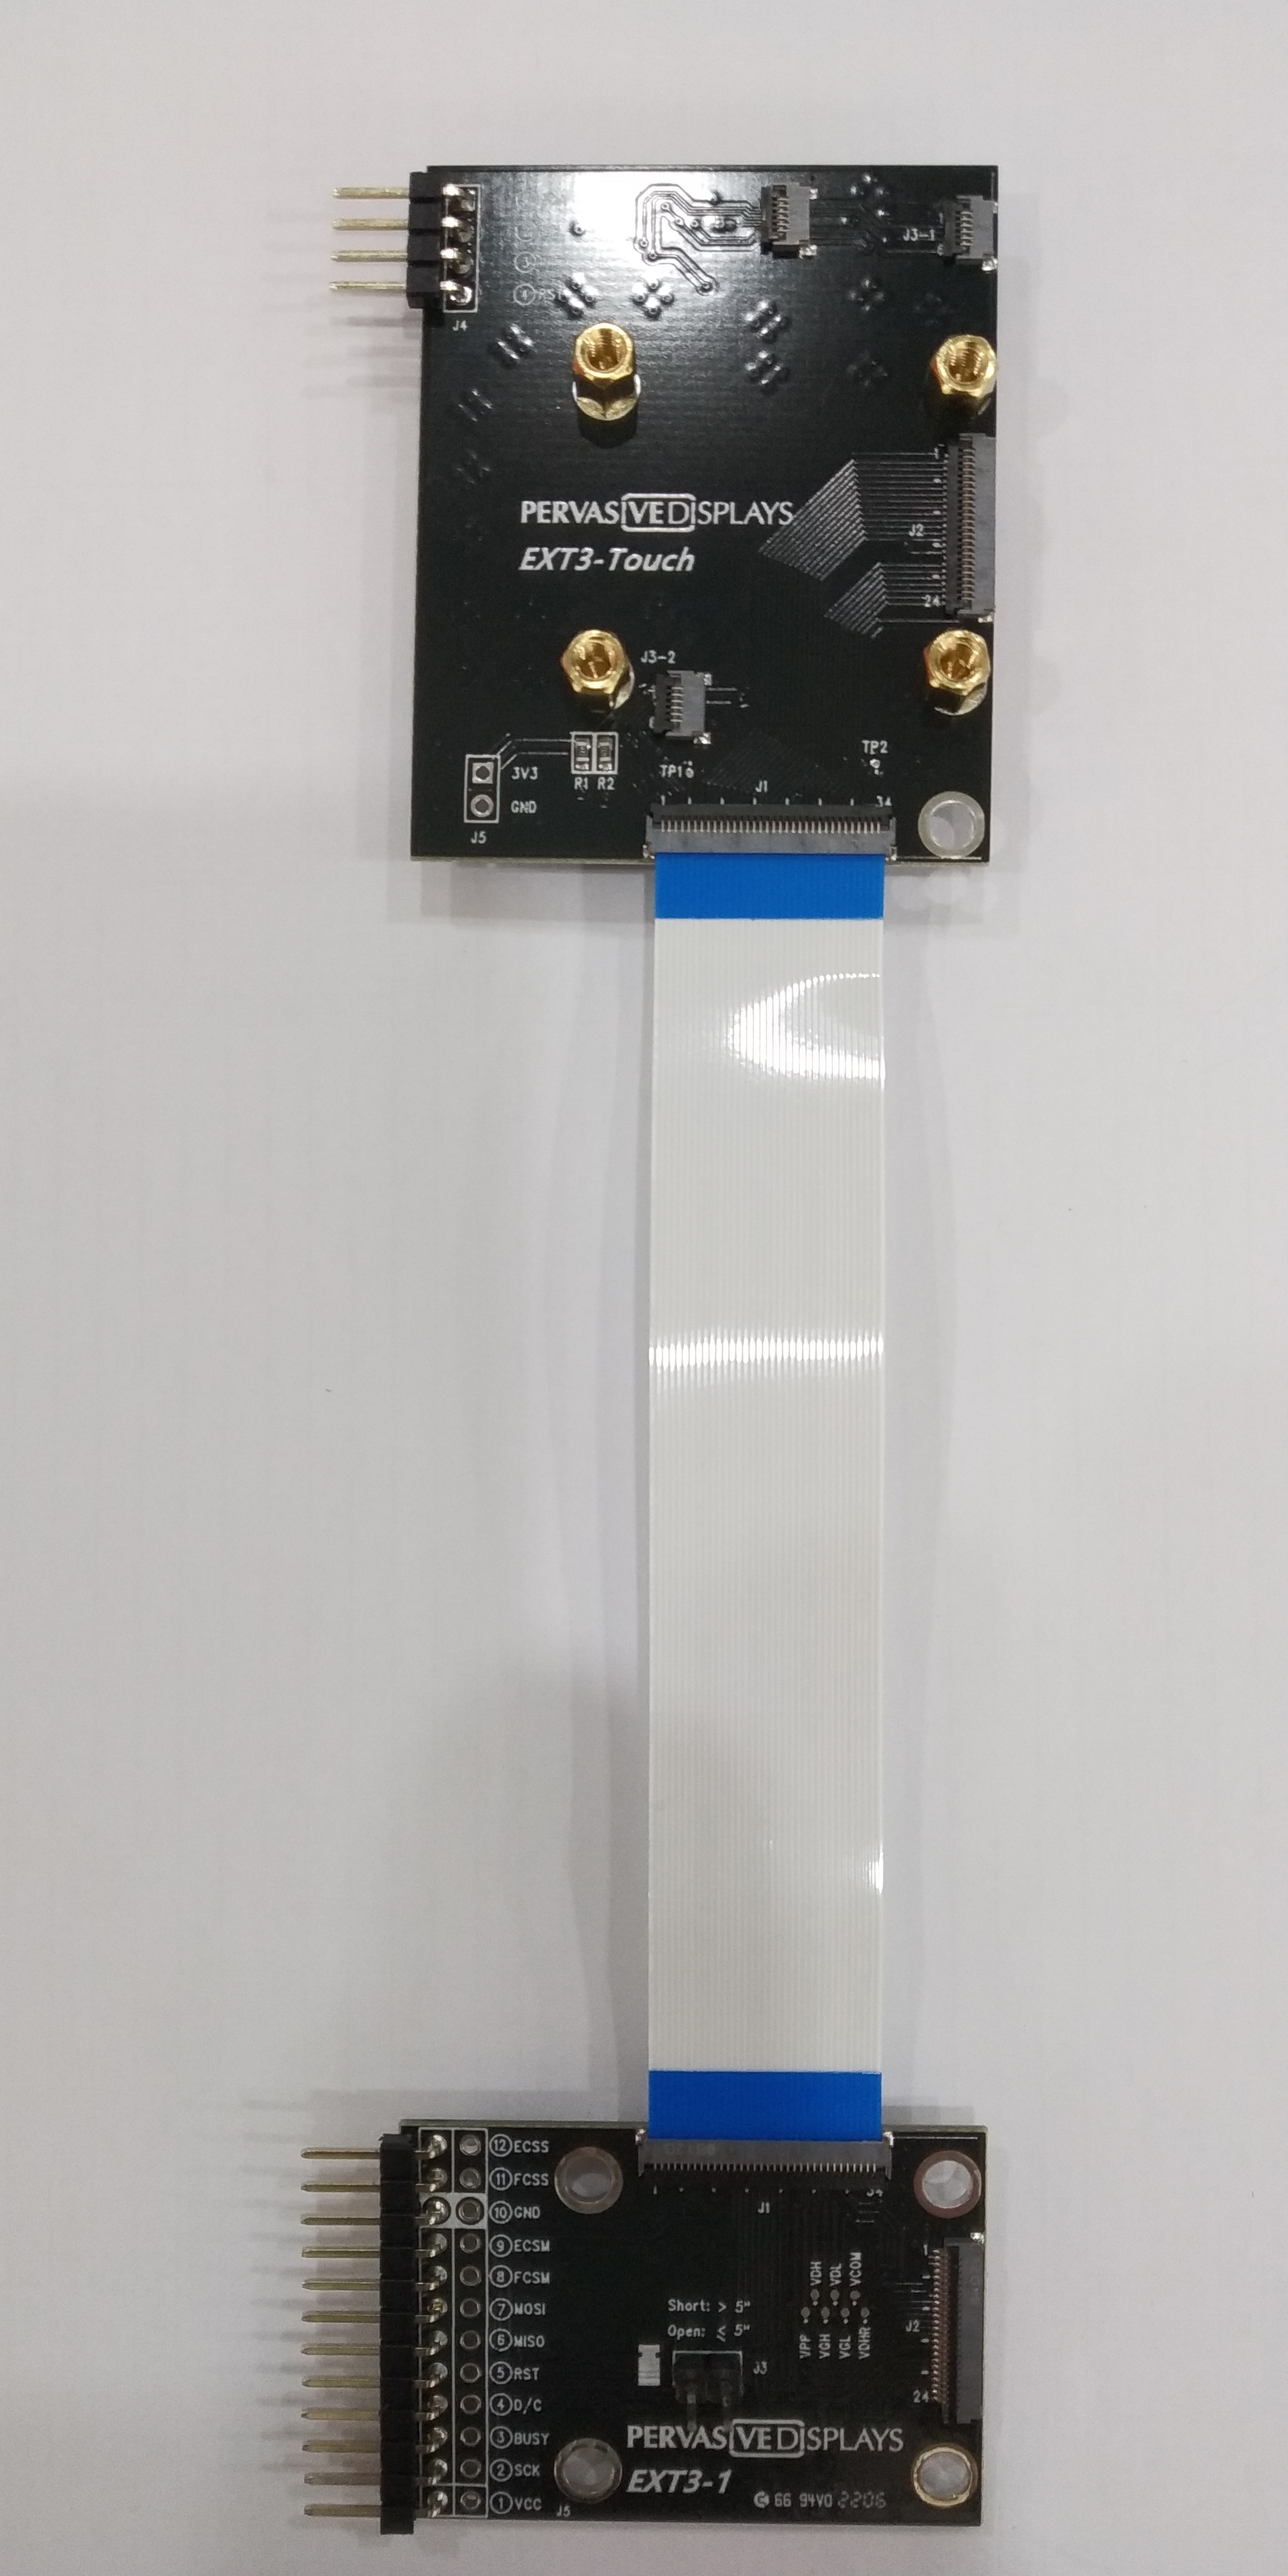
The EXT3 Touch board can be interfaced with the EXT3-1/EXT3 through the J1 ZIF header. The supplied FPC connects the EXT3-1/EXT3 24-pin J2 header to the Touch’s J1 header.
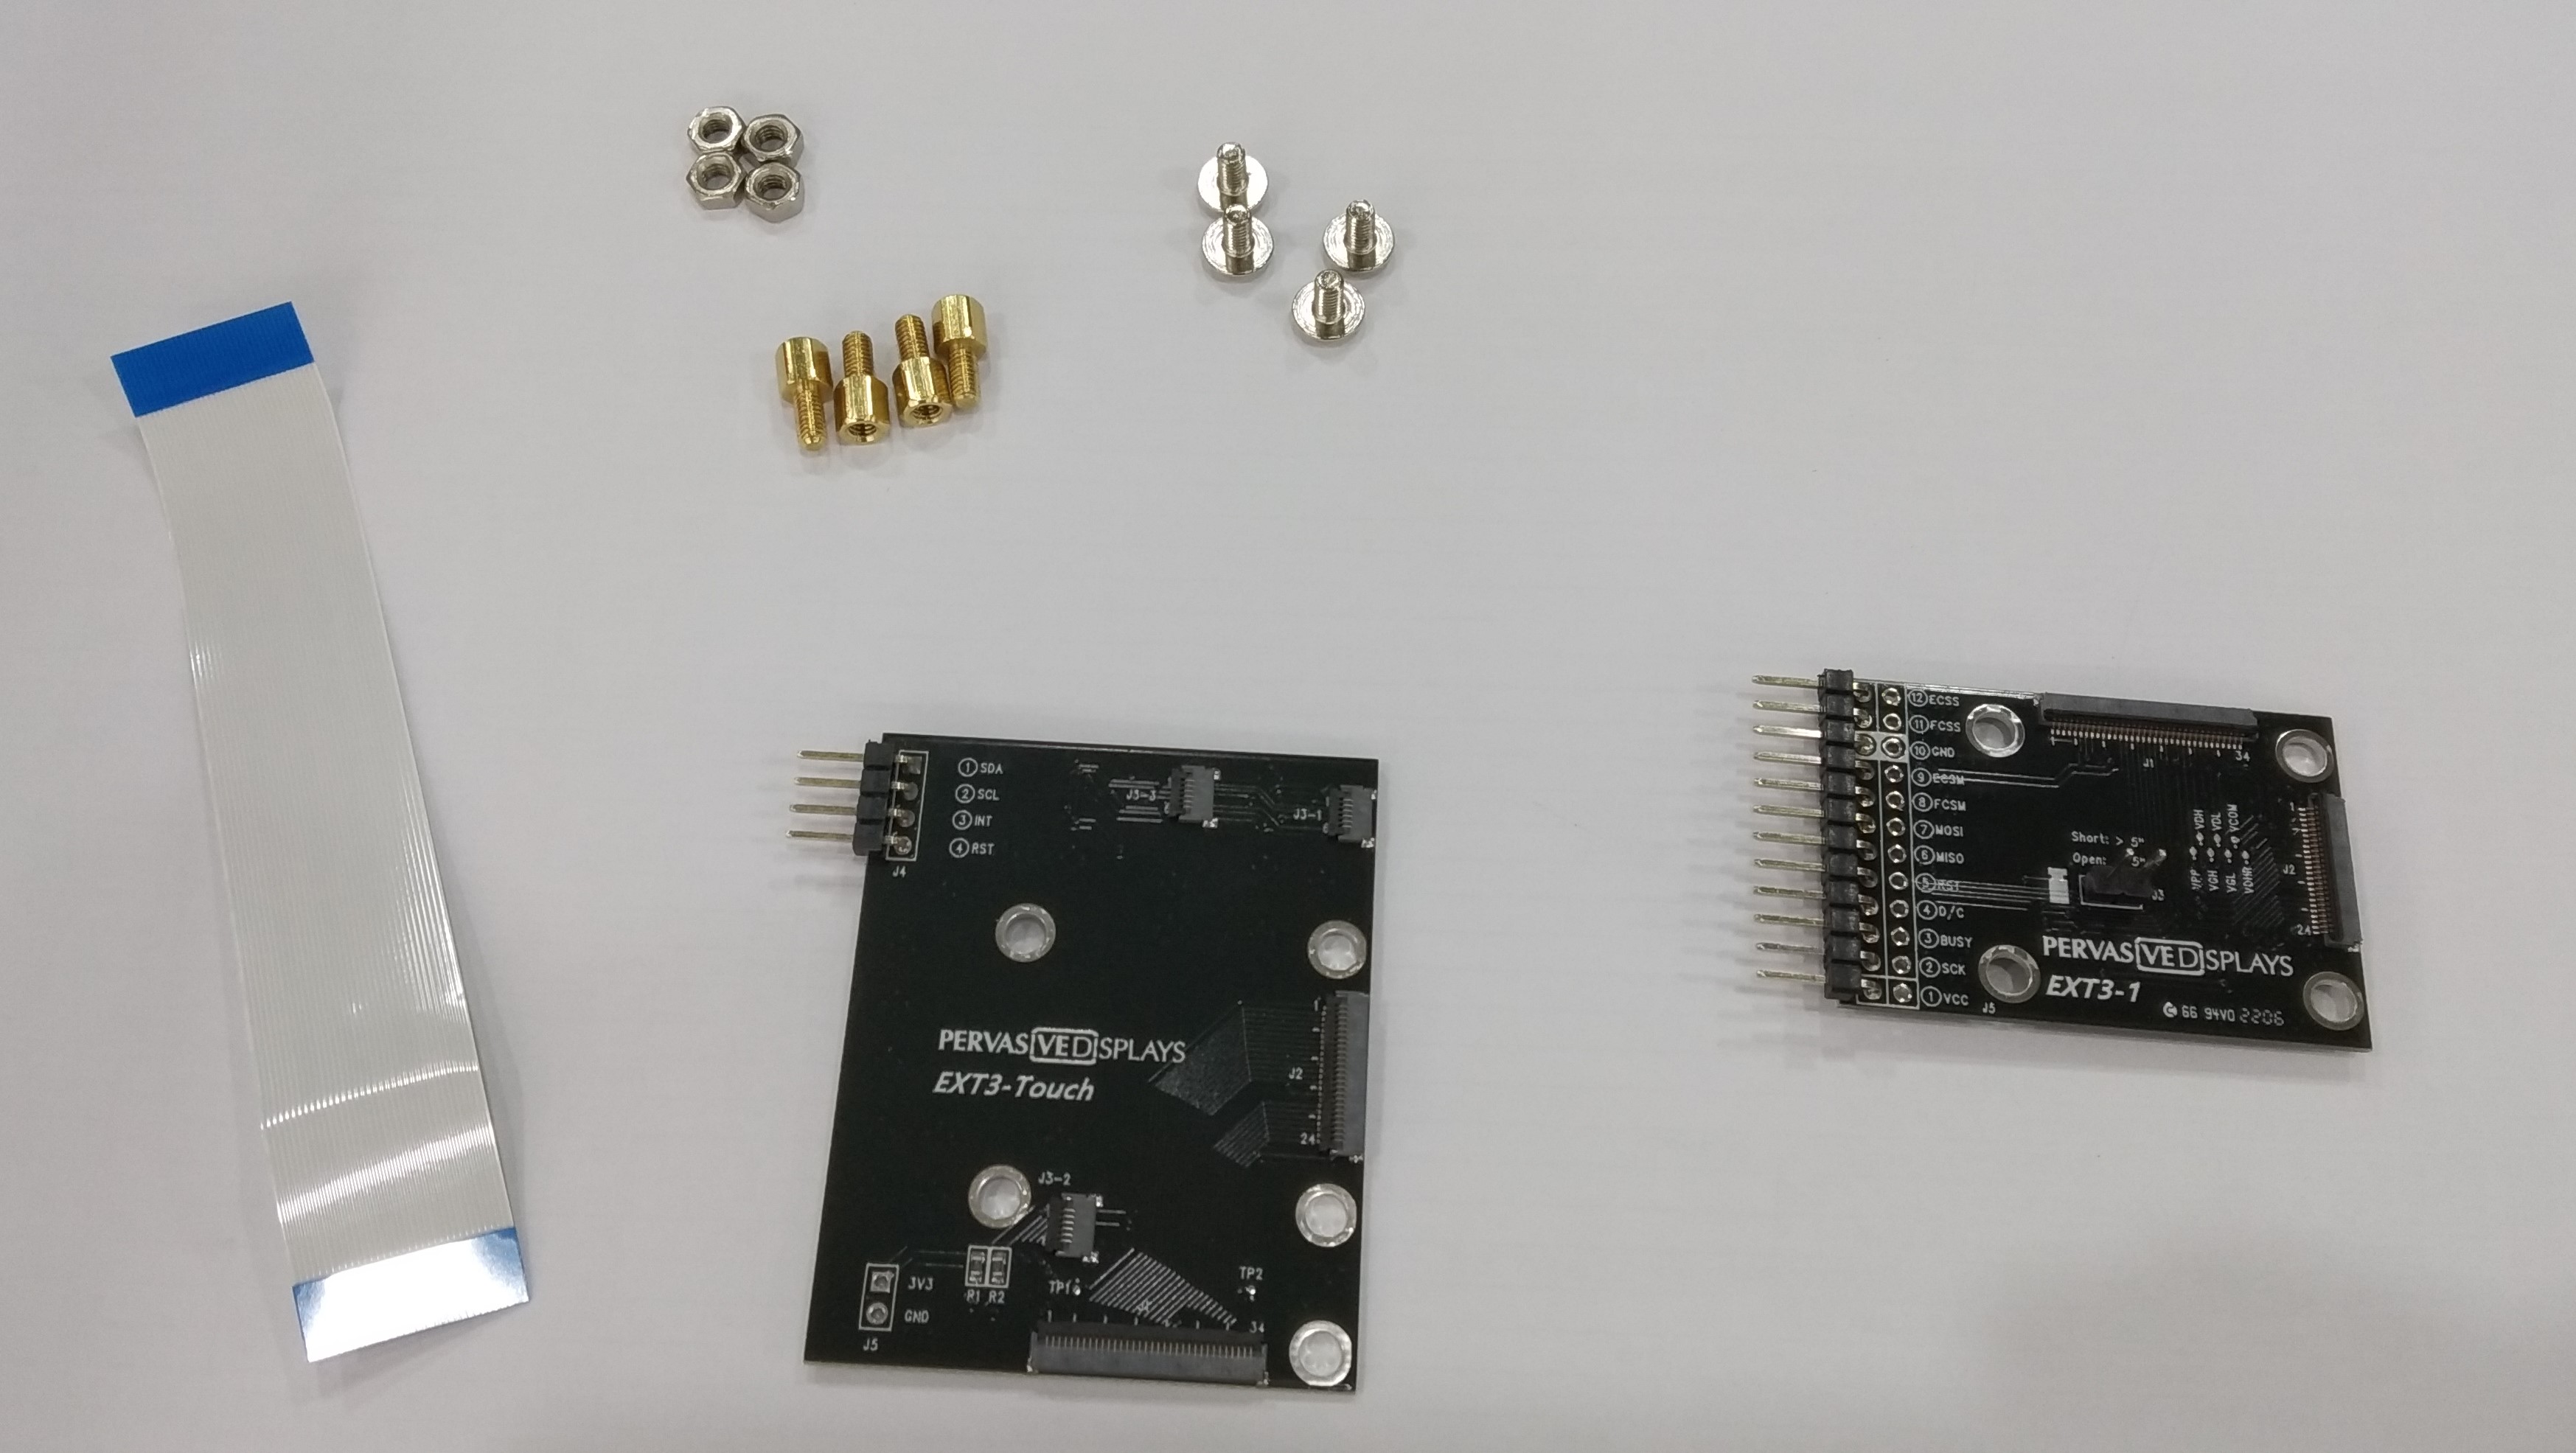
Mounting assembly
For ease of use and to protect the FPC from physical damage, it is suggested to mount the EXT3-1/EXT3 board on top of the Touch board. Mounting columns, screws and nuts are also supplied. The suggested assembly is shown below.
Step 1
Attach the column pilings and nuts.

Step 2
Mate the EXT3-1 with the EXT3 Touch by attaching the FPC.
Step 3
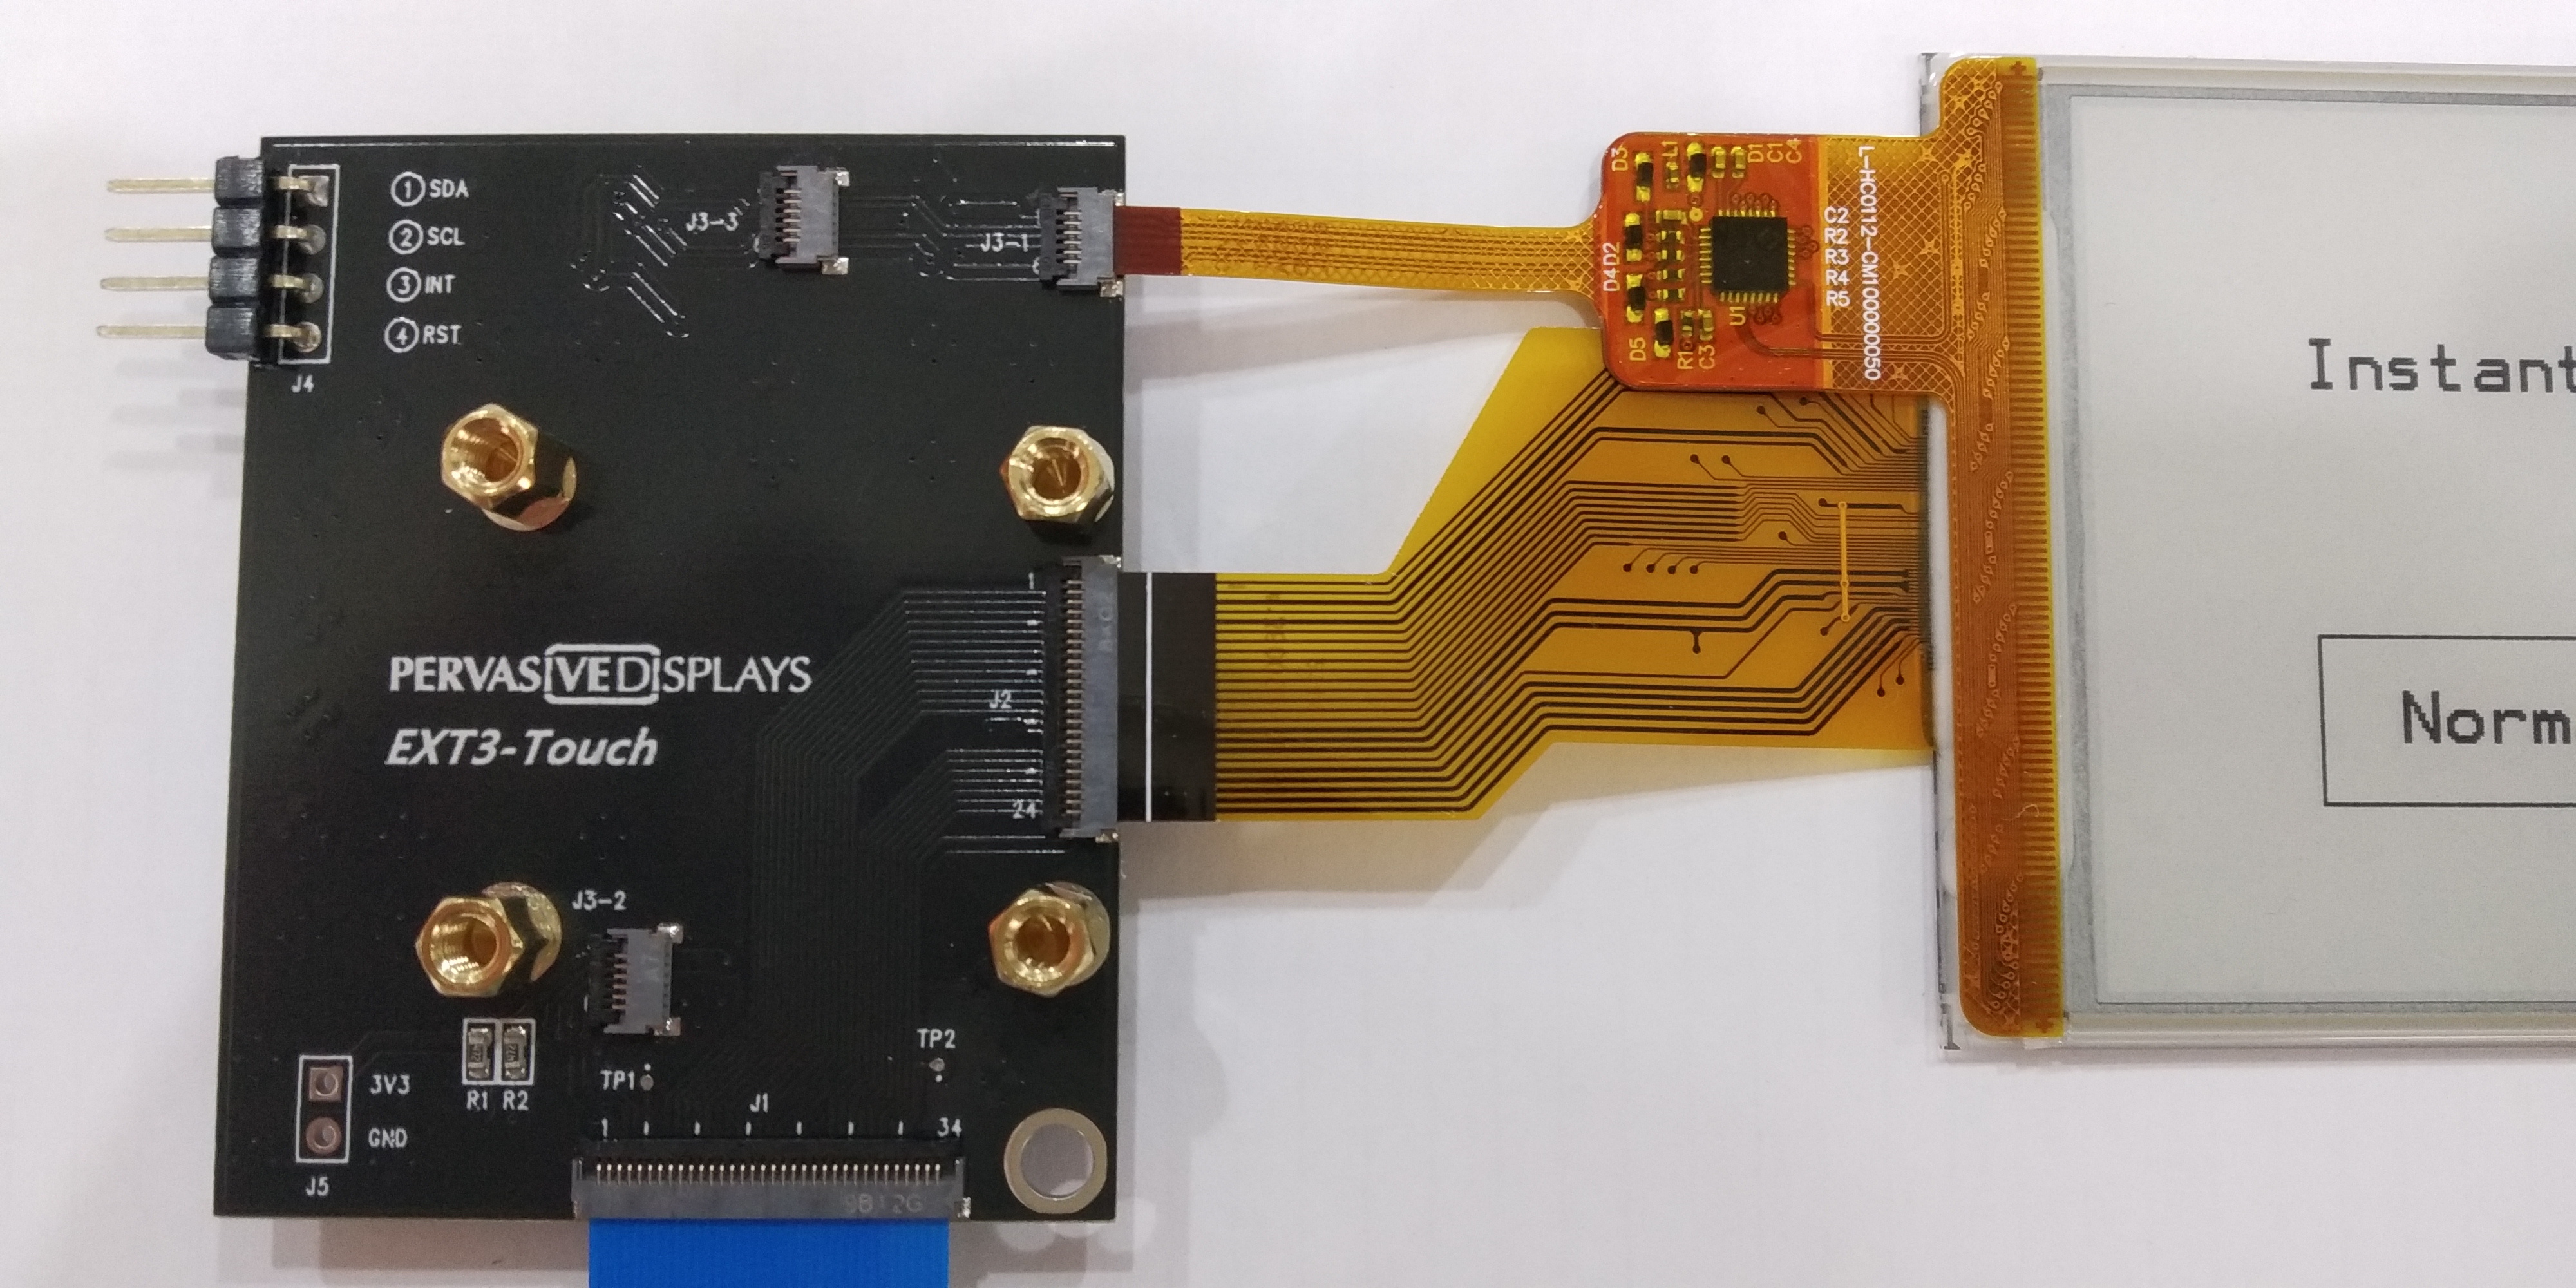
Connect the EPD and Touch, taking note of the EPD size and relevant ZIF headers.
Step 4
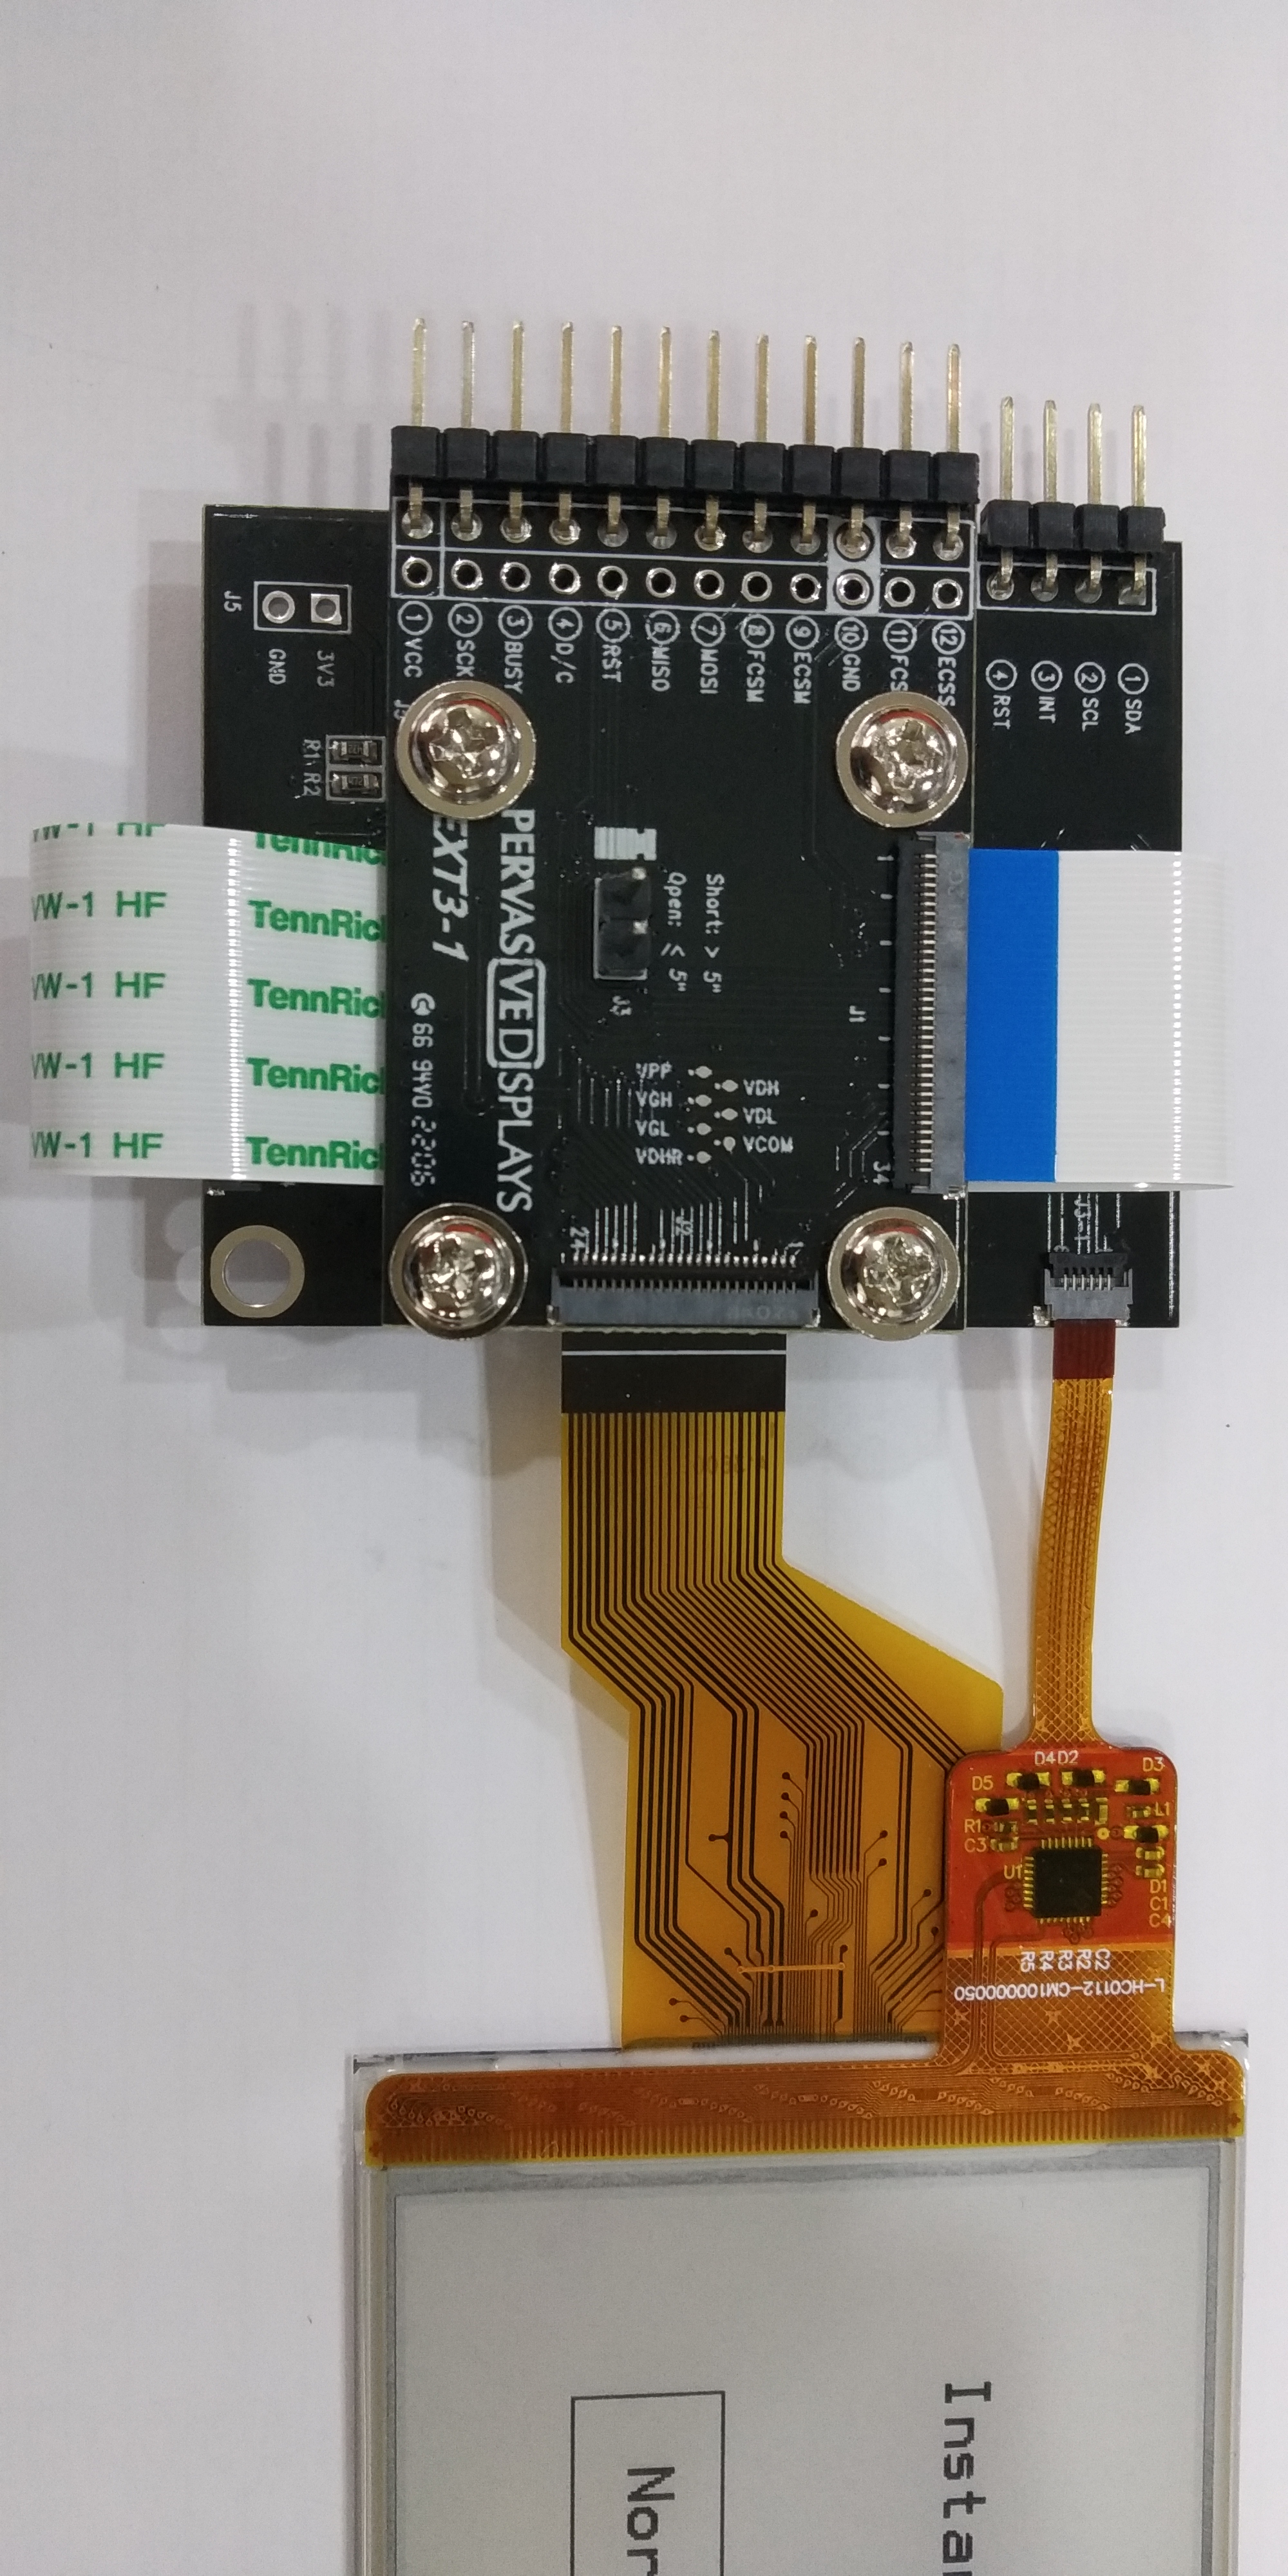
Fold the FPC such that the EXT3-1 can be mounted on top of the column pilings.
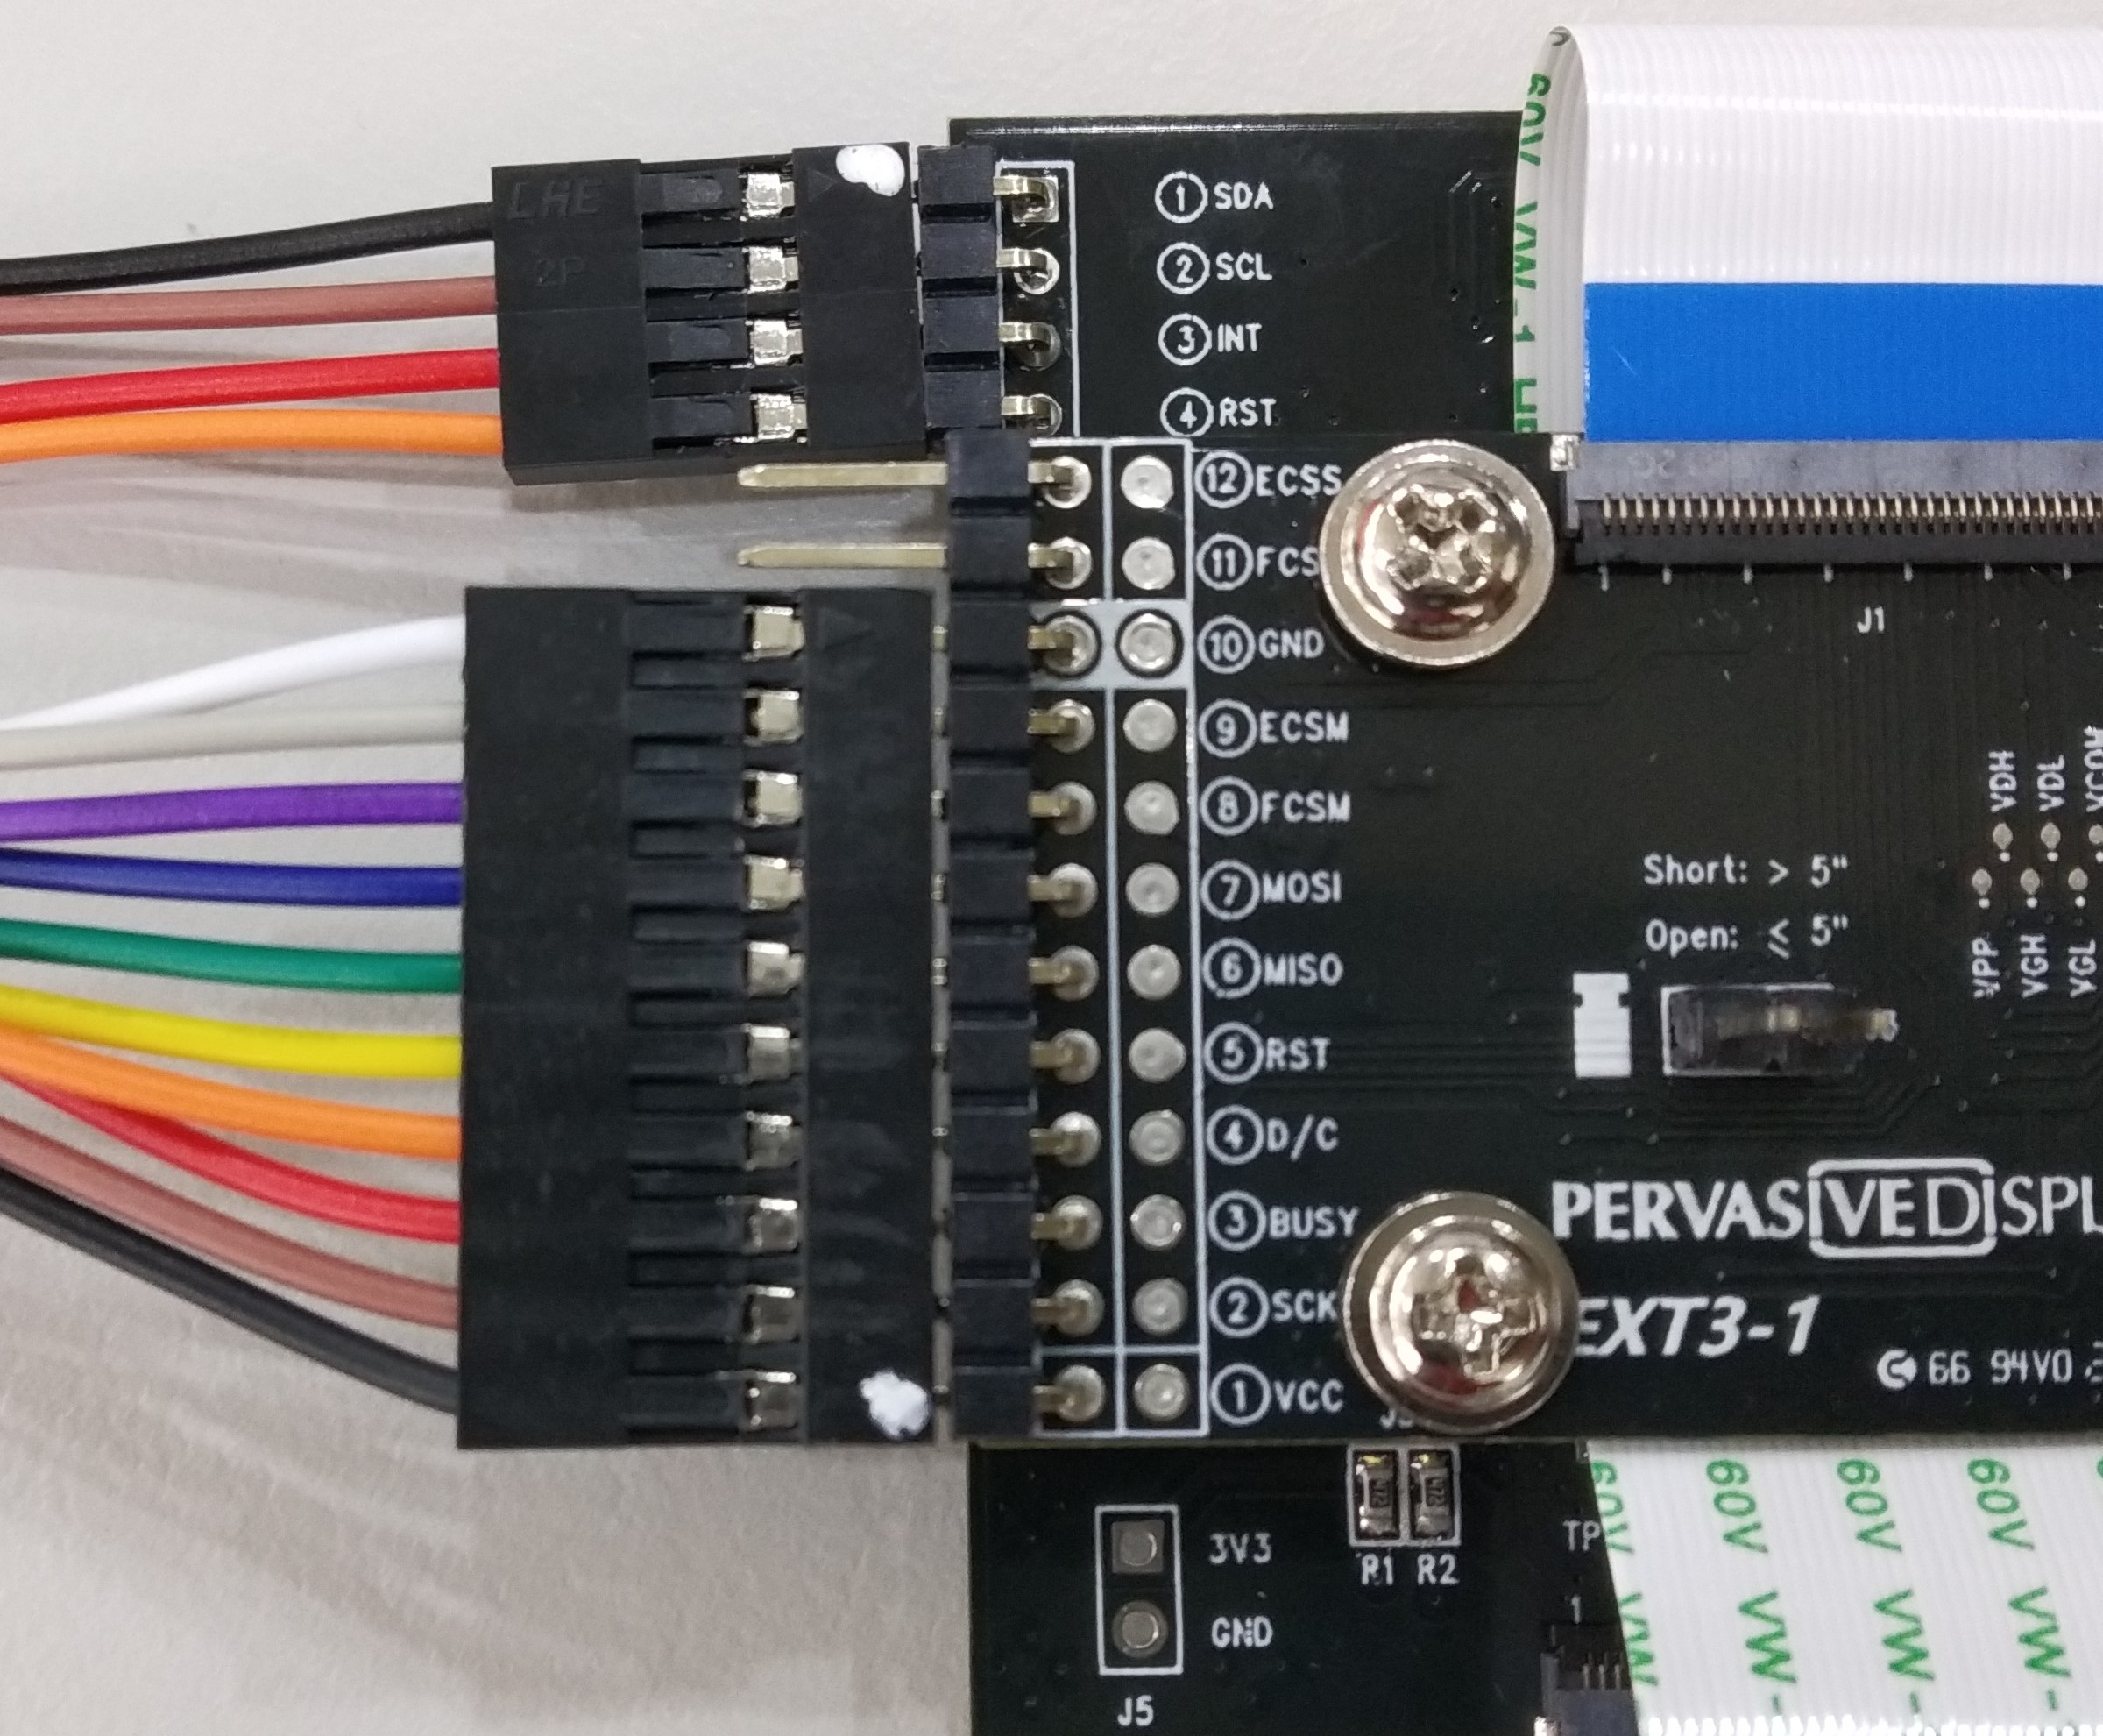
Connecting to your EVK
After successfully mounting the EXT3-1 to the EXT3 Touch, the next step is Notice that there are two headers to do so: The EXT3-1 header and the 4-pin header of the EXT3 Touch. Both are located on one side for convenience.
.png)
To connect your EVK to the EXT3-1, refer to Connecting To Your EVK.
To connect your EVK to EXT3 Touch, refer to the image below. Take note of the color coding for the proper wiring.
Working with EXT3-1
The driving source code can be used between Arduino and Energia, just the supported libraries of microcontroller kit are different. Arduino and Energia language are based on C/C++ where the file name extension is .ino file.
Before checking out the Touch demos, review the EPD application notes to understand EPD operations.